Did you just realize you’ve forgotten your WiFi password? Maybe a friend came over and asked for it, or you need to connect a new device. If you have a PC that’s already connected to that network—or has been in the past—you’re in luck. This guide walks you through recovering the password using built-in tools on Windows and macOS. No extra software needed, and it takes just a few minutes.
By the end, you’ll have the exact password for any saved WiFi network. Whether you’re a beginner or just need a quick refresher, this wireless password recovery tutorial will get you sorted. Let’s dive in.
What You’ll Need
- A PC (Windows or macOS) that is currently connected to the WiFi network or has connected to it before.
- Administrator access on Windows (to run Command Prompt).
- About 5 minutes of your time.
Step 1: Identify the Network Name
First, make sure you’re trying to recover the password for the right network. On Windows, click the WiFi icon in the system tray and see the network you’re connected to. On macOS, click the WiFi icon in the menu bar. Write down the exact network name (SSID) because you’ll need it later.
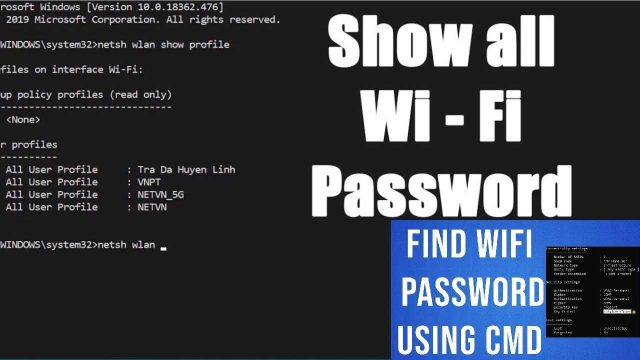
Step 2: Recover Password Using Command Prompt (Windows)
This is the fastest method. Open Command Prompt as an administrator: press the Windows key, type “cmd,” right-click on “Command Prompt,” and select “Run as administrator.” Then type the following command and press Enter: netsh wlan show profiles. You’ll see a list of saved networks. Find your network’s name from the list. Now type: netsh wlan show profile name="YOUR_NETWORK_NAME" key=clear (replace YOUR_NETWORK_NAME with the actual name). Look for the “Key Content” line under Security settings—that’s your password. For more details, see the full guide on how to show wifi password command prompt.
Step 3: Recover Password via Control Panel (Windows)
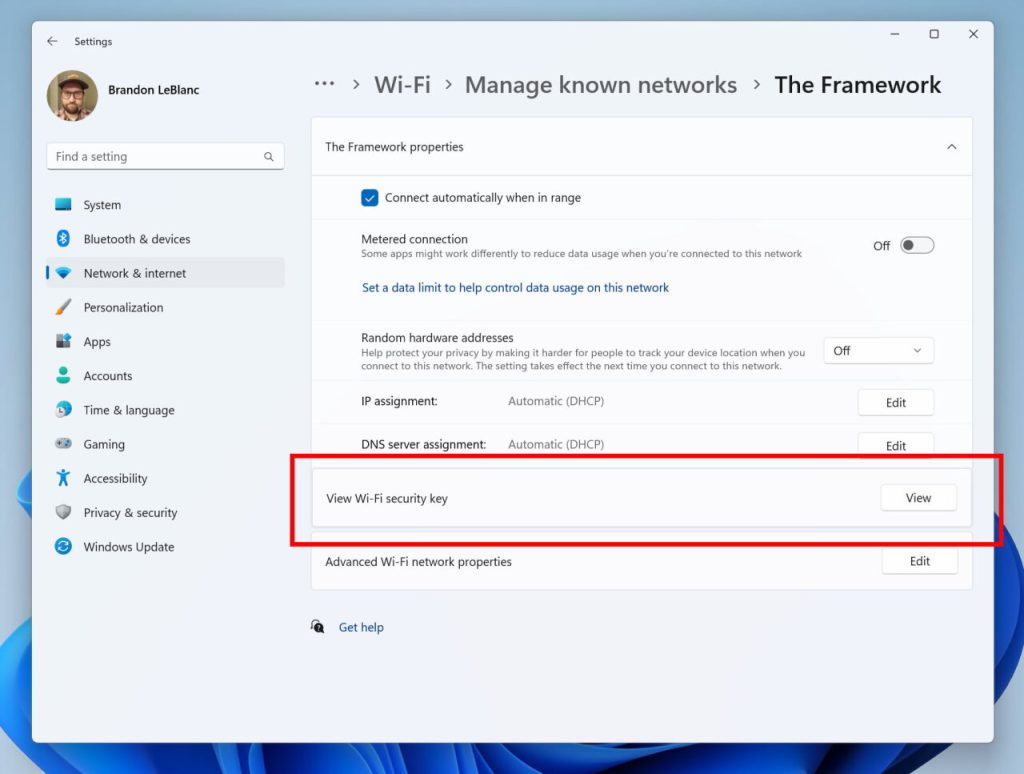
If you prefer a graphical interface, use the Control Panel. Go to “Control Panel” > “Network and Sharing Center” > click on your WiFi network name (next to Connections). In the WiFi Status window, click “Wireless Properties.” Go to the “Security” tab and check the box that says “Show characters.” Your password will appear in the “Network security key” field. This method is great for beginners and is a reliable wifi password recovery via control panel.
Step 4: Recover Password on macOS Using Keychain Access
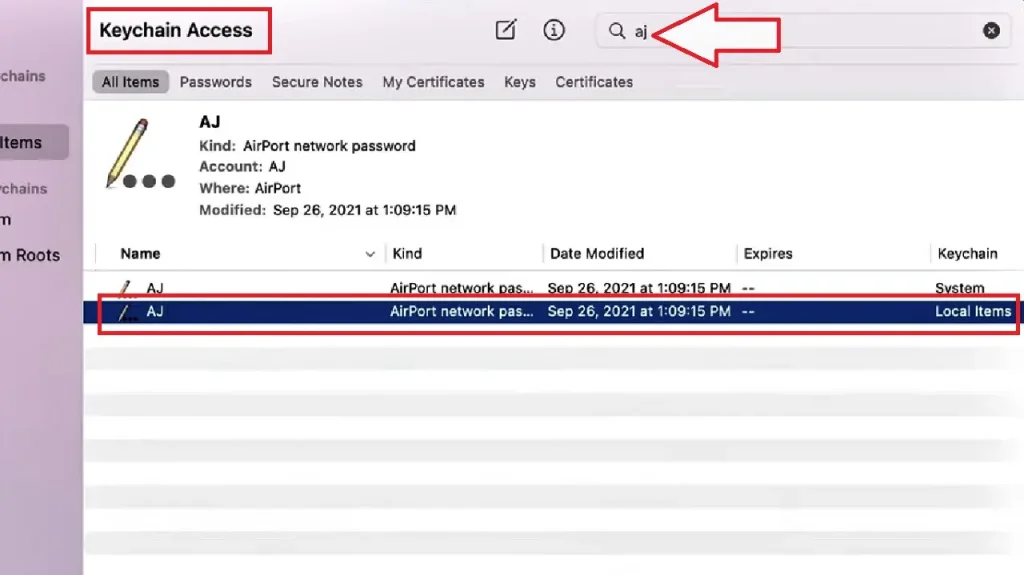
On a Mac, open “Keychain Access” from the Utilities folder (or search via Spotlight). In the search bar, type the name of your WiFi network. Double-click the network entry. A window will appear; check the box “Show password.” You’ll need to enter your Mac’s administrator username and password. After authentication, the WiFi password will be displayed. This is part of a broader wifi password recovery step by step process that works on all platforms.
Common Pitfalls
- Not running Command Prompt as administrator: If you see “Access denied” errors, close CMD and reopen it with admin rights.
- Network not saved on your PC: These methods only work if the PC has connected to the network before. If it’s a new network, you’ll need to access the router settings.
- Wrong network name: Typos happen. Double-check the SSID, especially if you have multiple similar names. Use the exact spelling from the list.
Always use these methods responsibly. Recovering passwords from networks you don’t own is illegal. Stick to your own networks or ones you have permission to access.
WiFi Password Recovery Best Practices
Where to Next
You’ve successfully recovered your WiFi password! If you need help on other devices, check out our wifi password recovery for windows users guide or the wireless password recovery tutorial. For Linux users, we also have a guide on how to view saved wifi password linux. Bookmark this page for future reference, and don’t forget to share it with friends who might be locked out of their own Wi-Fi.