You know the feeling: a friend comes over and asks for your WiFi password, and your mind goes blank. Or maybe you just set up a new device and can’t find that sticky note you wrote it on. Don’t worry—your Windows PC has your back. If you’ve ever connected to a network before, the password is stored safely in the system. In this guide, I’ll show you how to retrieve it using the good old Control Panel. No third-party tools, no command lines, just a few clicks.
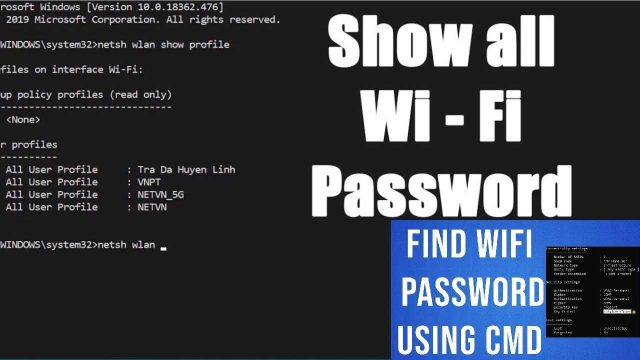
By the end of this tutorial, you’ll be able to pull up any saved WiFi password on your Windows machine. This method works on Windows 10 and 11, and it’s the quickest way if you have physical access to a computer that already connects to the network. If you prefer alternative methods, check out our guide on viewing saved passwords via terminal or accessing the router admin page for other approaches.
What You’ll Need
- A Windows PC (10 or 11) that has previously connected to the WiFi network.
- Administrator access to that PC (you’re likely the admin if it’s your personal computer).
- No additional software required—just the built-in Control Panel.
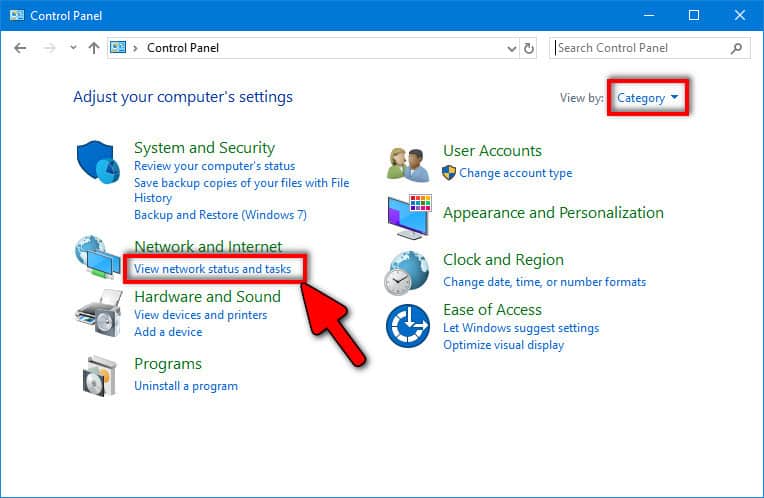
Step 1: Open the Control Panel
Click the Start button (or press the Windows key) and type “Control Panel” into the search bar. Select the Control Panel app from the results. If you prefer the classic view, switch to “Large icons” or “Small icons” from the View by dropdown in the top right. This makes it easier to find what you need.

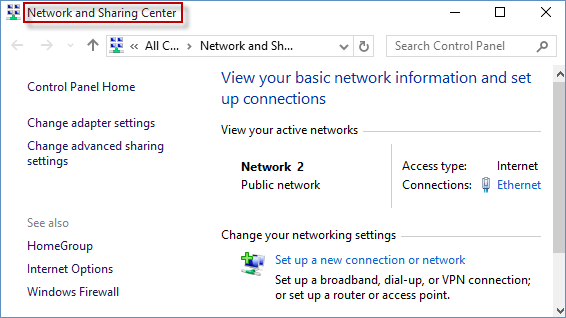
Step 2: Navigate to Network and Sharing Center
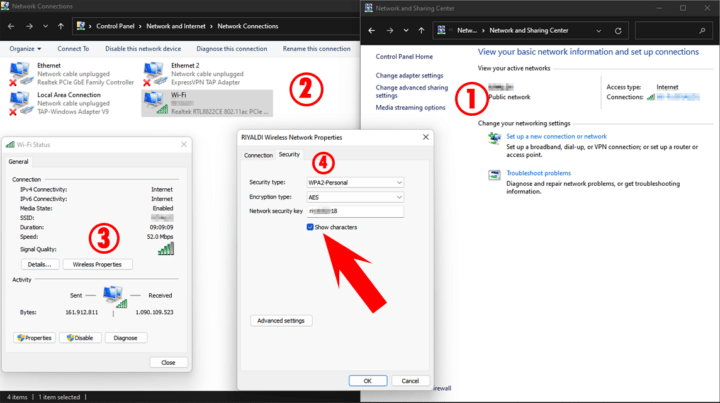
In the Control Panel, click on “Network and Sharing Center.” You’ll see an overview of your active networks. Don’t worry if you’re not currently connected—this section also manages saved network profiles.
Step 3: Open Manage Wireless Networks
In the left sidebar, click on “Manage wireless networks.” This will show a list of all WiFi networks your computer has ever connected to. If you don’t see this option, it might be because you’re on Windows 11—in that case, skip to Step 3a (below). For Windows 10, proceed directly.
Step 3a (Windows 11): Use Settings Instead
Windows 11 moved this functionality to the Settings app. Go to Settings > Network & Internet > Advanced network settings > More network adapter options. Then right-click your WiFi adapter and select “Status,” then “Wireless Properties.” This will get you to the same security tab. Alternatively, you can still use the classic Control Panel by searching for “Network Connections” and right-clicking your WiFi adapter.

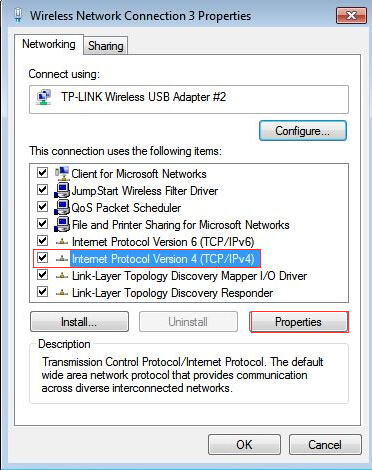
Step 4: Access the Network Properties
Find the network whose password you want to recover from the list. Right-click it and select “Properties.” A new window will pop up. Go to the “Security” tab. Here you’ll see the network security key field—your password, but it’s hidden by default.
Step 5: Reveal the Password
Under the “Security” tab, check the box that says “Show characters.” Your WiFi password will instantly appear in plain text in the “Network security key” field. Write it down or copy it somewhere safe. That’s it—you’re done!
Alternative: Using the Taskbar Wi-Fi Menu (Quick Trick)
If you’re currently connected to the network, there’s an even faster way. Click the Wi-Fi icon in the taskbar, then click on the network name (it should say “Connected”). Click “Properties” under that network. Scroll down to “View Wi-Fi security key” and click the eye icon. This bypasses the Control Panel entirely. However, for networks you’re not currently connected to, the Control Panel method above is your best bet.
Common Pitfalls
- **Administrator rights required**: If you’re on a work or school computer, you may not have admin privileges, and the “Show characters” option will be greyed out. In that case, ask your IT department or use an alternative method like the router admin page.
- **Network not listed**: The “Manage wireless networks” list only shows profiles that have been saved. If you’ve never connected to the network on this PC, it won’t appear. Try connecting once first, or recover the password from a device that has it.
- **Windows 11 differences**: As mentioned, the classic Control Panel path is partially deprecated in Windows 11. Make sure to use the Settings workaround or the network adapter properties. Don’t panic if you don’t see “Manage wireless networks”—just follow Step 3a.
Where to Next?
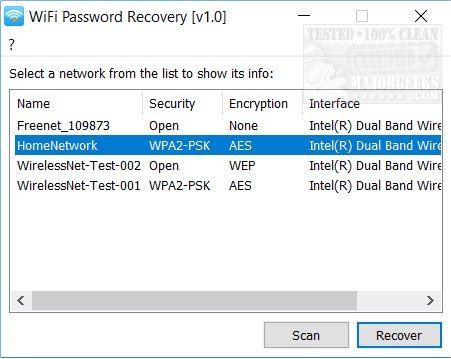
Now that you’ve recovered your password, consider free WiFi password recovery software for bulk export of all saved networks. If you’re planning a system upgrade, don’t forget about backing up your WiFi passwords to avoid losing them. For advanced users, the expert recovery guide covers more scenarios. And if you ever need to retrieve a password from a router directly, our router admin page walkthrough has you covered.