Ever needed to connect a new device to your WiFi but couldn’t remember the password? If you have a Windows PC that’s already connected to that network, you can dig out the password without any third-party tools. This tutorial will show you how to use the built-in netsh command to export your WiFi profile and reveal the password. It’s a quick, no-nonsense method that works on Windows 7 through Windows 11. For an even deeper dive, check out our wifi password recovery expert guide.
By the end of this guide, you’ll have the password in plain text, saved to an XML file on your desktop. No apps to install, no shady software—just a few command-line strokes. If you prefer a visual approach across different operating systems, the view saved wifi password using terminal article covers macOS and Linux too.
What You’ll Need
- A Windows PC (any version from Windows 7 to Windows 11) that has previously connected to the WiFi network
- Administrator privileges on that PC (you need to be able to run Command Prompt as admin)
- The exact name (SSID) of the WiFi network whose password you want to recover
- A folder to save the exported profile (we’ll use C:WiFiBackup, but you can pick any location)
Step 1: Open Command Prompt as Administrator
Press the Windows key, type ‘cmd’, right-click on ‘Command Prompt’ in the search results, and select ‘Run as administrator’. If you’re asked for permission, click ‘Yes’. This is essential—without admin rights, the export command won’t work. The forgotten wifi password recovery command also requires admin access, so get used to this step.
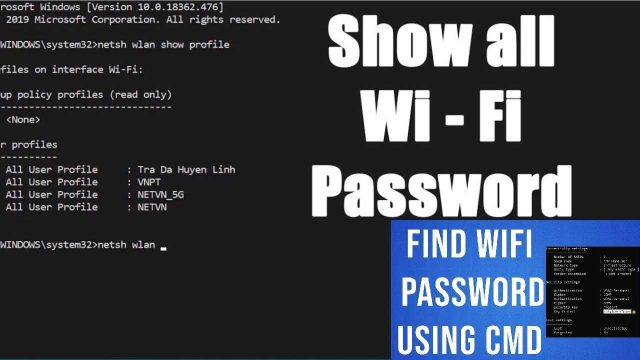
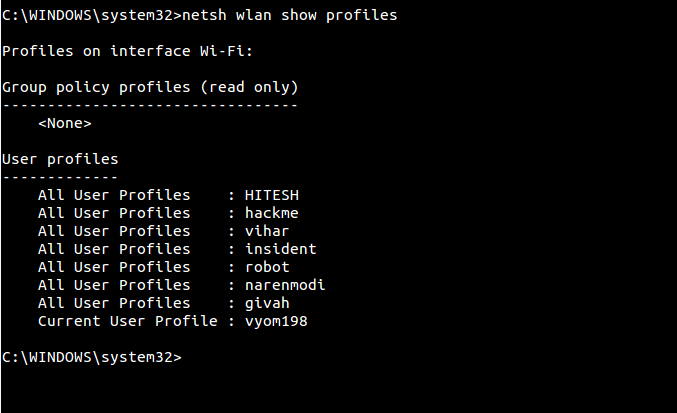
Step 2: List All Saved WiFi Profiles
In the Command Prompt window, type the following command and press Enter: netsh wlan show profiles. This will display a list of every WiFi network your PC has ever connected to. Look for the SSID (network name) you need. Note it exactly as shown—case matters in the next step.
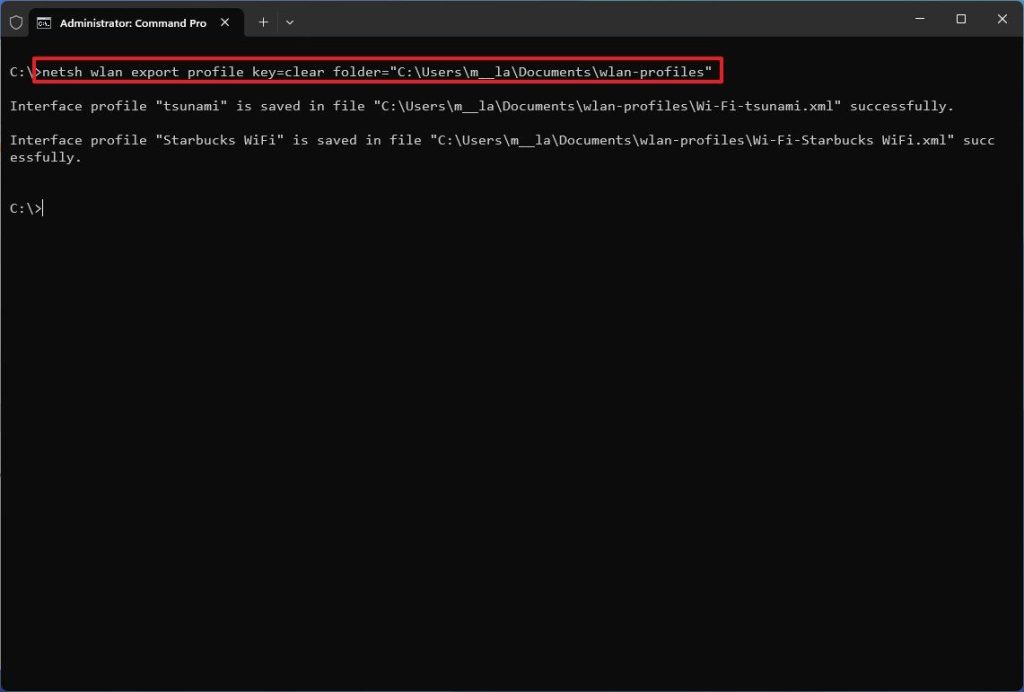
Step 3: Export the WiFi Profile with Password
Now, run the following command, replacing ‘YourSSID’ with the exact name from Step 2: netsh wlan export profile name="YourSSID" folder="C:WiFiBackup" key=clear. The key=clear parameter tells Windows to save the password in plain text. If you omit it, the password will be encrypted and useless. Press Enter, and you should see a message like ‘Profile YourSSID is saved in file …’. If the folder C:WiFiBackup doesn’t exist, create it first with mkdir C:WiFiBackup.
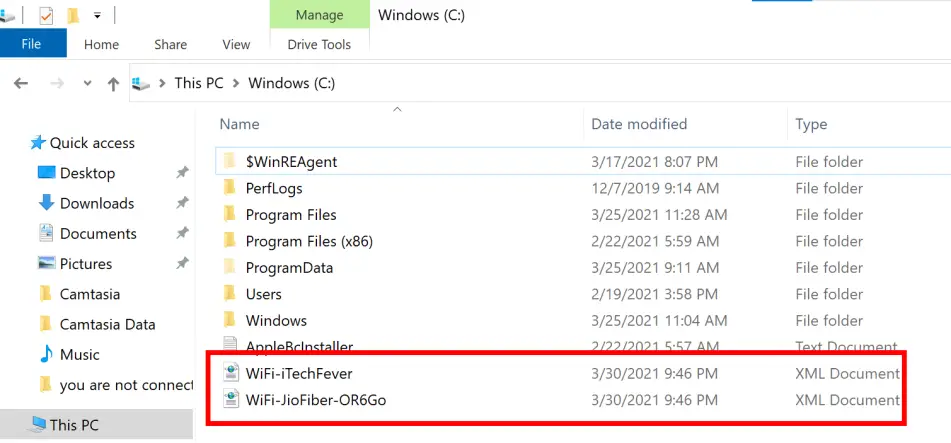
Step 4: Open the Exported XML File
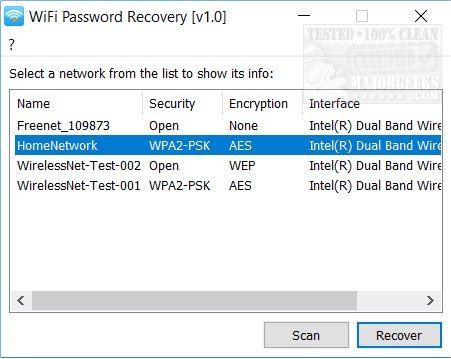
Navigate to C:WiFiBackup (or whichever folder you used). You’ll see a file named something like ‘WiFi-YourSSID.xml’. Right-click it, choose ‘Open with’, and select Notepad (or any text editor). The file contains all the network settings, including the password tucked away inside. If you prefer a dedicated tool, some wifi password recovery software can also parse these files, but Notepad works fine.
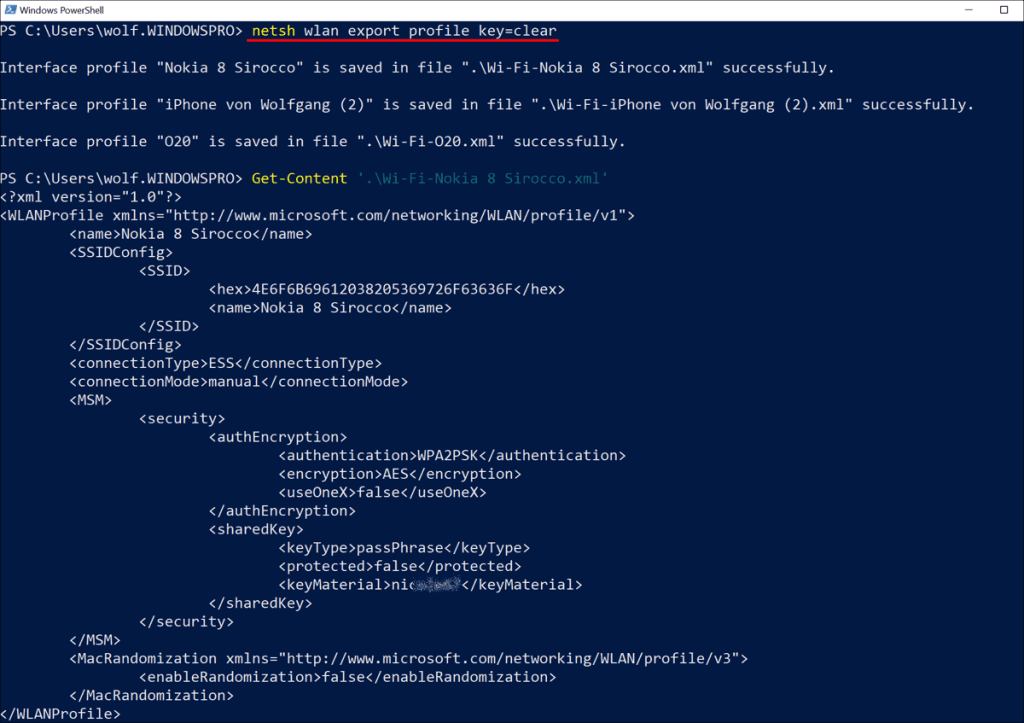
Step 5: Locate the Password
In the XML file, search for the tag . The password will be written between those tags, like MySecurePass123. That’s it! Copy the password and use it anywhere you need. For a broader perspective on recovery methods, our wifi password recovery ultimate guide covers everything from routers to backups.
Common Pitfalls
- Not running Command Prompt as Administrator: The export command will fail with an ‘Access denied’ error. Always right-click and choose ‘Run as administrator’.
- Incorrect SSID: If you misspell the network name, the command won’t find the profile. Use the exact name from the
show profilesoutput, including spaces and special characters. - Forgetting the
key=clearparameter: Without it, the password is stored in an encrypted blob that you can’t read. Always includekey=clear.
Where to Next
Now that you’ve recovered your WiFi password, you might want to learn how to recover your personal wifi password on other devices or from your router’s admin panel. If you prefer a graphical tool, check out our recommendations for wifi password recovery software that can automate the process. For Android or Mac users, our guides have you covered too—just browse the site for more solutions.