Ever needed to reconnect a device to your home WiFi but forgot the password? Or maybe you’re setting up a new laptop and want to transfer all your saved networks without hunting down each password. This guide is for you. By the end, you’ll have a plain text file listing every WiFi network your Windows PC has ever connected to, along with their passwords — all using Command Prompt. No extra software, no hassle.
This method works on Windows 7 through Windows 11. It’s a straightforward way to recover your own saved networks. If you’re looking for a broader approach that covers other platforms like Mac or Android, check out our saved wifi password recovery tutorial. But for pure Windows cmd, you’re in the right place.
What You’ll Need
- A Windows computer (any version from Windows 7 to Windows 11)
- Administrator access (you’ll need to run Command Prompt as admin)
- A text editor like Notepad to view the exported file
Step 1: Open Command Prompt as Administrator
Click the Start button, type “cmd” or “Command Prompt”, right-click the result, and select “Run as administrator”. If prompted by User Account Control, click “Yes”. A black window with a blinking cursor will appear — that’s your command line.
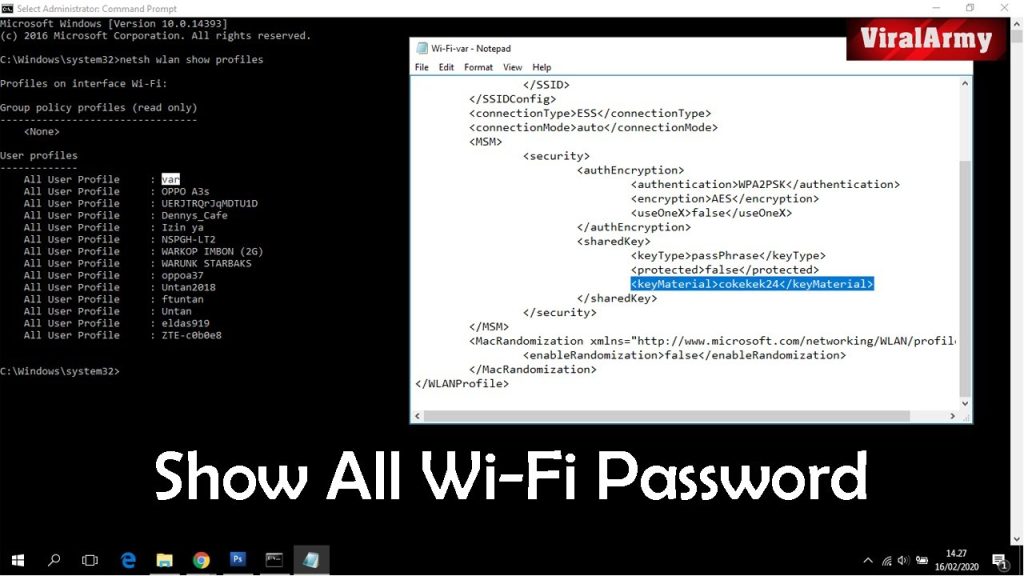
Step 2: List All Saved WiFi Profiles
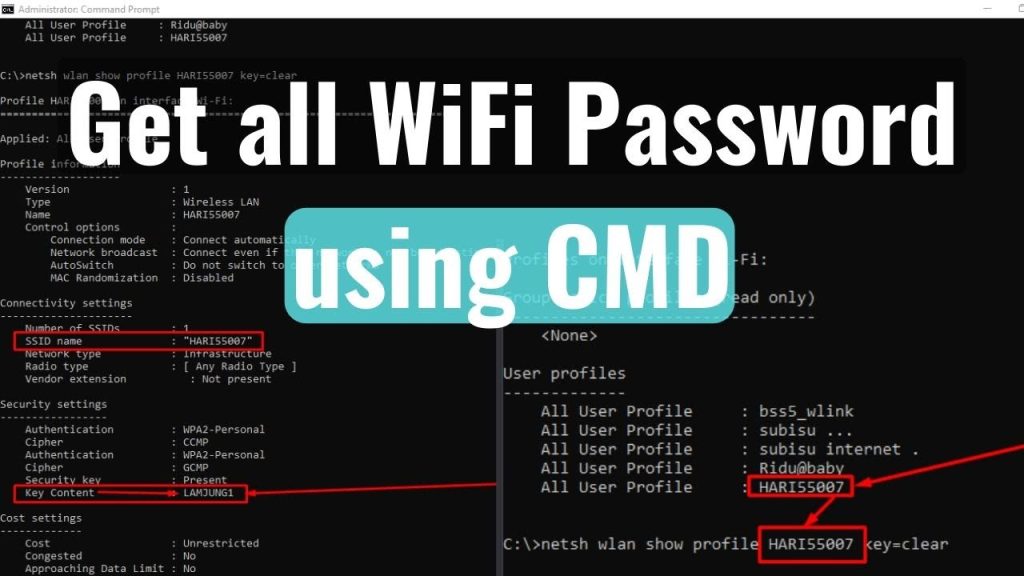
In the Command Prompt window, type the following command and press Enter:
You’ll see a list of every WiFi network your PC has ever connected to. Note the exact name (case matters) of the network whose password you want to export. This step is essentially the same as the wifi password recovery command for windows that many tech sites recommend.
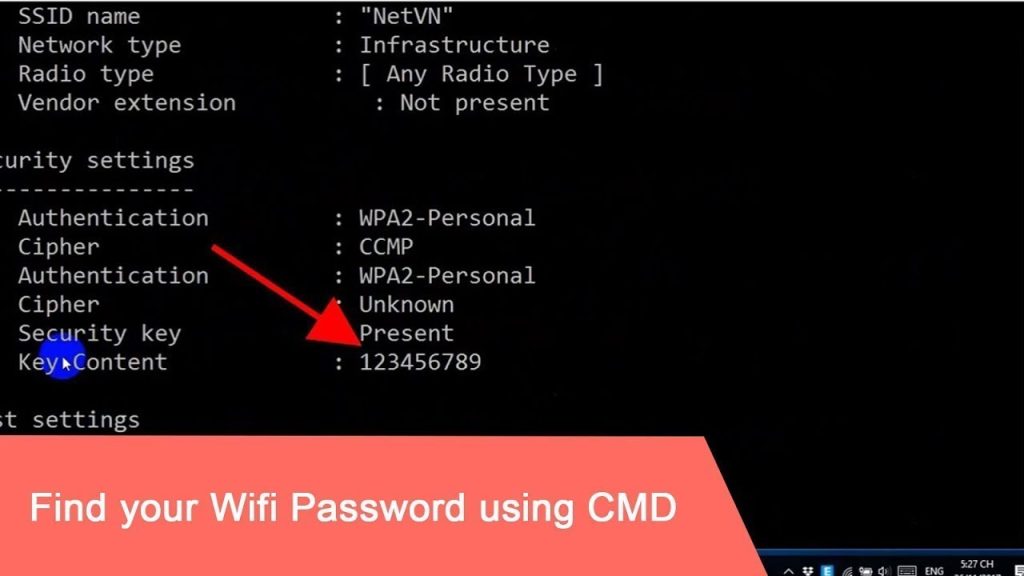
Step 3: View Password for a Single Profile
To see the password for one network, use this command (replace “YourNetworkName” with the actual profile name):
Look for the line that says “Key Content” — that’s your password. For example, if your network is “HomeWiFi”, you’d type: netsh wlan show profile name=”HomeWiFi” key=clear. This is the easiest wifi password recovery method when you only need one password.

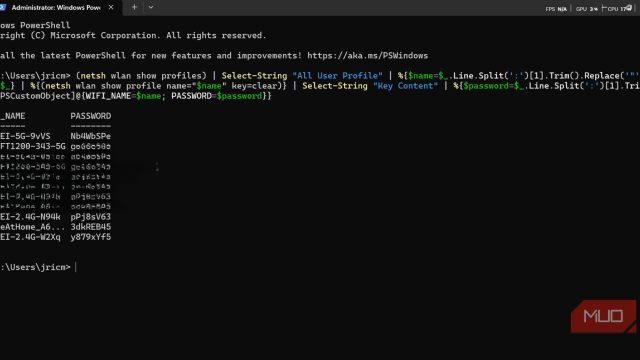
Step 4: Export All Passwords to a Text File
Instead of copying passwords one by one, export everything at once. Run this command in the same admin Command Prompt:
After pressing Enter, you’ll see a lot of output but don’t worry — it’s being written to a file. When it finishes, open your Desktop; you’ll see a file named “wifi_passwords.txt”. This file contains all the details for every saved network. If you prefer a cleaner approach using network settings, our wifi password recovery using network settings guide covers that alternative.
Step 5: Read the Exported File
Double-click the wifi_passwords.txt file on your Desktop to open it in Notepad. You’ll see each network profile listed with its SSID, authentication type, and the Key Content (password) clearly shown. You can now copy, print, or share this file (but keep it secure — it contains sensitive info). For a more detailed walkthrough specific to Windows 11, check out our wifi password recovery tutorial windows 11.
Common Pitfalls
- Not running as administrator: If you skip Step 1 and just open Command Prompt normally, you’ll get an error like “The wireless interface is not running.” Always right-click and run as admin.
- Profile name with typos: The netsh command is case-sensitive. If you type “homewifi” but the actual profile is “HomeWiFi”, you’ll get no results. Use the list from Step 2 to get the exact name.
- Outdated Windows version: On very old builds (pre-Windows 7), the netsh wlan commands may not work. Update your system or use third-party tools. For common errors, our wifi password recovery troubleshooting guide has solutions.
Where to Next
Now that you have your WiFi passwords exported, you can use them to connect other devices or just keep them as a backup. If you lost passwords on a different platform — like Mac or Android — check our other guides. For more advanced recovery methods or if you need to recover passwords after a router reset, browse the rest of our site. Happy connecting!